Pinkfresh Studio “Pure Bliss” Release Blog Hop & Giveaway!!
Hi and welcome back to my blog!
I know that last month I told you that things would be different for the Pinkfresh Studio releases this year, and that the blog hops would stop but it seems the people have spoken and by popular demand, they are back!!

So first things first, this is a blog hop so you should have come here from the insanely talented Emily Midget and the next stop is the one and only Rachel Alvarado. The full hop list can be found via the inLinkz link and also on the Pinkfresh Studio blog post.
There is a very generous giveaway as well to celebrate! TWO lucky winners will win the entire release! To be in with a chance for this incredible prize, you will need to comment on the Pinkfresh Studio blog post and on the release video on the Pinkfresh Studio YouTube channel.
Furthermore, TEN $50 gift cards to the Pinkfresh Studio shop will be given to randomly drawn names from across the blog hop stops.

Winners will be drawn and announced on February 19th on the Pinkfresh Studio Winner Announcement page. Make sure to check it and if you see your name there, you have two weeks to email Pinkfresh to claim your prize.
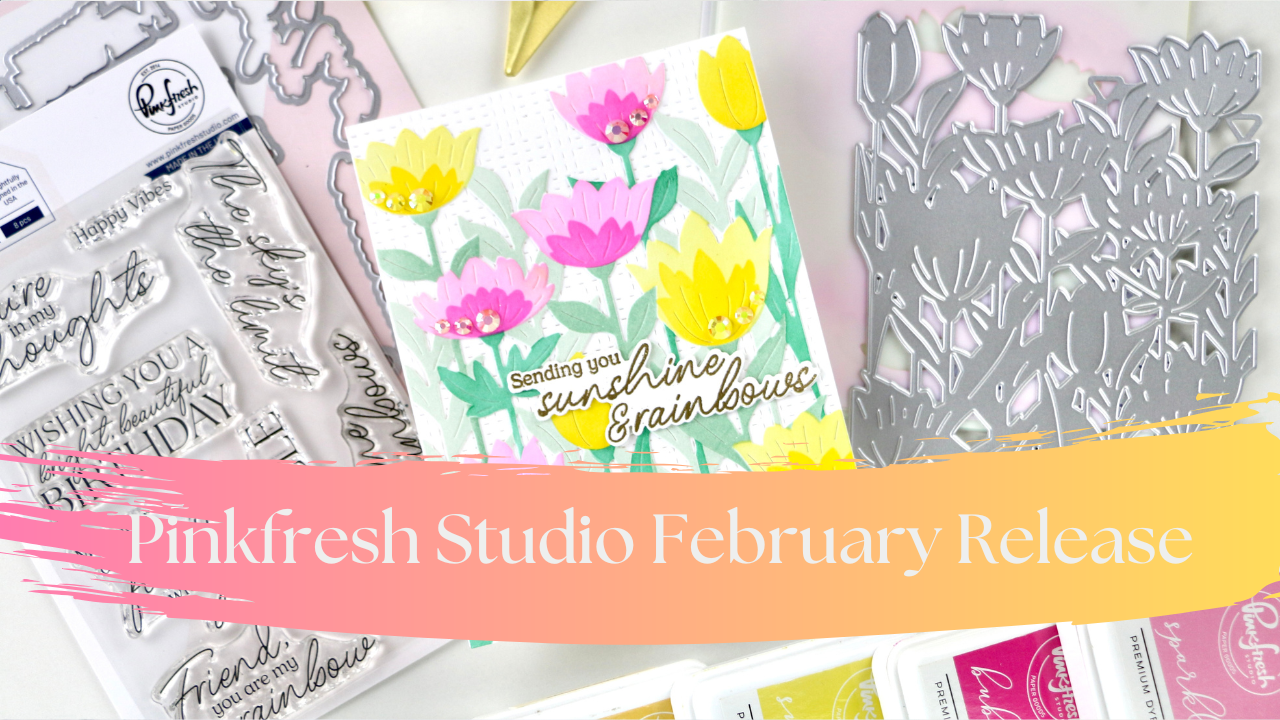
For my card I have used the You Are My Rainbow product suite, which is a lovely sentiment set. There is a stamp set, and coordinating diecuts to give that lovely detail of each sentiment being perfectly cut out.


If you know which sentiment you are going to use on your card, it makes sense to just stamp that one, but if you are prepping for a big card making session, why not stamp up several in one go? Heat embossing these look fabulous, by the way.
I made a video showing off the release as well as the process for my cards. I have used the Floral Field product suite as well, for two different cards. They both have You Are My Rainbow sentiments on them.

The Floral Field set comes with layering stencils and a coordinating diecut, and for my first card I used Sage, Eucalyptus, Spruce Tips, Lemon Whip, Sunshine, Sweet Mustard, Sparkling Rose and Bubble Gum.
After ink blending the Floral Field image, I used the coordinating diecut to cut it out, and while I had my diecutting machine out I also used the Stitched Basket Weave cover plate on a piece of white card stock for the background.
I heat embossed the sentiment in Rich Gold embossing powder and used the coordinating diecut to cut it out, as well as a couple more pieces to layer it up.
I also added a few Ballet Slipper and Sunshine gems on the card and with that, the card was done.
The second card is using the same Floral Field product suite, only with different colours. This time I used Mint, Meadow, Emerald City, Lemon Whip, Sweet Mustard, Sparkling Rose and Raspberry Bliss.

I used the Floral Field coordinating diecut again, but for this card I had a differed idea for the finished card. I wanted to create a bit of a stained glass window look, so first I cut out the biggest oval from the Essentials Nested Ovals Double Stitched out of an 11”x4.25” piece of card stock.

First you need to score the card stock as you would a normal card base, and then open it with the front facing down. Glue down the floral diecut and then layer it with a panel of vellum.

This sentiment, Wishing you a bright, beautiful birthday, is also heat embossed in Rich Gold, but not layered up, and the card is finished off with Glacier gems.
That’s it from me for today, but don’t forget to hop along for more inspiration and check out my YouTube video too! If you shop the new release from Pinkfresh Studio, I’d be so grateful if you use the compensated affiliate links I have used in this blog post. They don’t cost you anything extra at all, but the earrings I get from these are essential for the running costs of this website, VPN, filming equipment and software etc. You know, the boring but necessary stuff.
Lots of love and creativity, sparkle and light from Erica