
Alex Syberia Designs BetterPress Release Blog Hop & Giveaway
Today I am delighted to be taking part in a blog hop to celebrate the Alex Syberia March BetterPress release!
There is a giveaway too, Alex Syberia Designs is giving away a $50 gift certificate to 1 winner and a $15 gift card to 3 lucky winners.
Open internationally. All 4 winners will be drawn from the entrants that have played along with this Blog hop by midnight BST April 6th, 2025. Winners will be announced on the Alex Syberia Designs blog 'Giveaway Winners' page on April 7th, 2025.
If you came here from Erin you are on the right track. The next stop on the hop is Emelie, and if you find any broken links along the hop, you can find the whole lineup on the Alex Syberia blog post.
Ok, so for my card, and yes, I only have one. My package arrived on Monday and I just haven’t had time to make more just yet, but I will for sure because have you seen these goodies?? Insert heart eyes here!

I started out by hot foiling the absolutely stunning Abstract Background press plate, in Matte Gold, on white card stock. This pattern is simply lovely, and I adore it.
To add a little bit of colour, and I really mean ‘a little’, I used the coordinating layering stencils and mostly leftover ink on my blending tools. I wanted a soft pastel look, and while I did have to add a little bit more from a couple of ink pads, it really is mostly leftover ink!

When I was happy with the panel, I trimmed it down to just a touch smaller than 4.25”x5.5”, to get that lovely white frame around it. On the back of this I added the 1” wide Instant Dimension Foam Tape from Altenew, and then adhered this to a card base.

For the sentiment I wanted to keep it really simple, and I went back into my Alex Syberia Designs stash and dug out one of my fave word dies that simply says ‘smile’. This one seems to be discontinued, so excuse me while I go cry in the corner!!
This is cut out of Brushed Gold metallic card stock, also from Altenew. It’s also layered up with two pieces cut out of white card stock.
With some liquid glue, this is a sneak peek of the new glue coming to Altenew in June, I adhered these all together and then added it to the card.
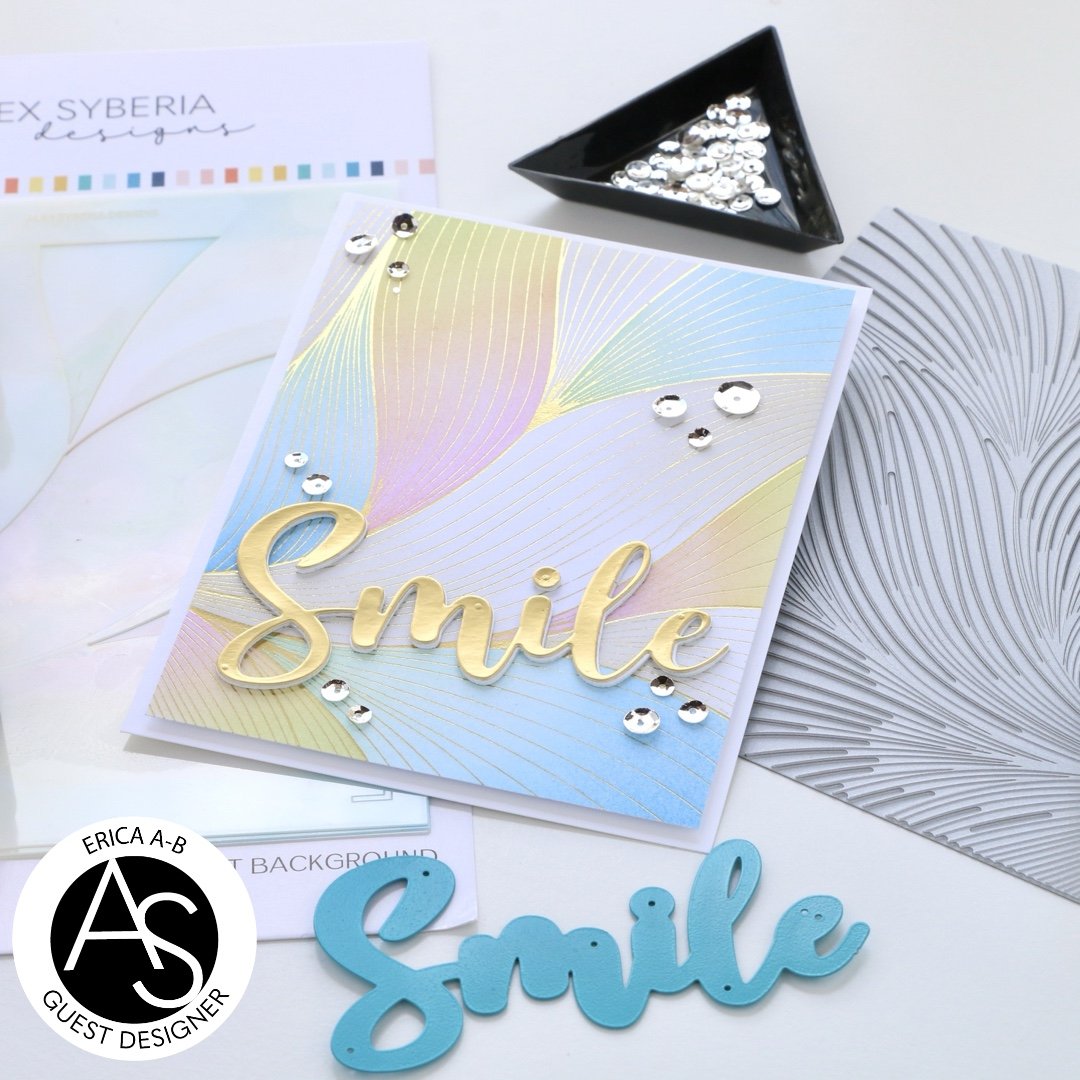
One final little touch, because when can I say no to sparkle and bling?, I added some Stellar Sequins in Dazzling Diamond. These are also a sneak peek from Altenew, these are probably being released in June too.
This Abstract Background Press Plate will definitely get a lot of use from me, I have so many ideas on how to use it!
That’s it from me for today. I hope you enjoyed this little card and that it made you smile! Don’t forget to leave me a comment down below, to be in with a chance to win the giveaway and then hop along the rest of the hop to see more amazing projects and be inspired.

With love and light, sparkle and creativity from your gal Erica

celebrating parents card drive with altenew | Blog hop and giveaway!
Hi and welcome back to my blog!
Today I am blog hopping with Altenew and friends to Celebrate Parents Card Drive. Altenew will generously donate $1 with every order from the Sentiment Stamps collection from 3/7/2025 until 4/22/2025 to the Food Bank of Central New York to support seniors in need.
There is a giveaway as well, to celebrate, and there are $200 in total prizes! To help support this card drive, Altenew is giving away a $50 gift certificate to 2 lucky winners and a $20 gift certificate to 5 winners! Please leave a comment on the Altenew Card Blog and/or each designer’s blog post on the blog hop list below by March 31, 2025 for a chance to win. Altenew will draw 7 random winners from the comments left on each stop of this blog hop and announce the winners on the Altenew Winners Page on April 2, 2025.

As I mentioned before, this is a blog hop and you can find the whole lineup in the InLinkz link below, or in the Altenew blog post.
I’m going to show you a card I made with one of the smallest diecuts in the Fun Little Envelopes set. I simply cut the hearts out of a panel five times, and on the back of this I adhered strips of coloured card stock so they would peek out of the hearts.
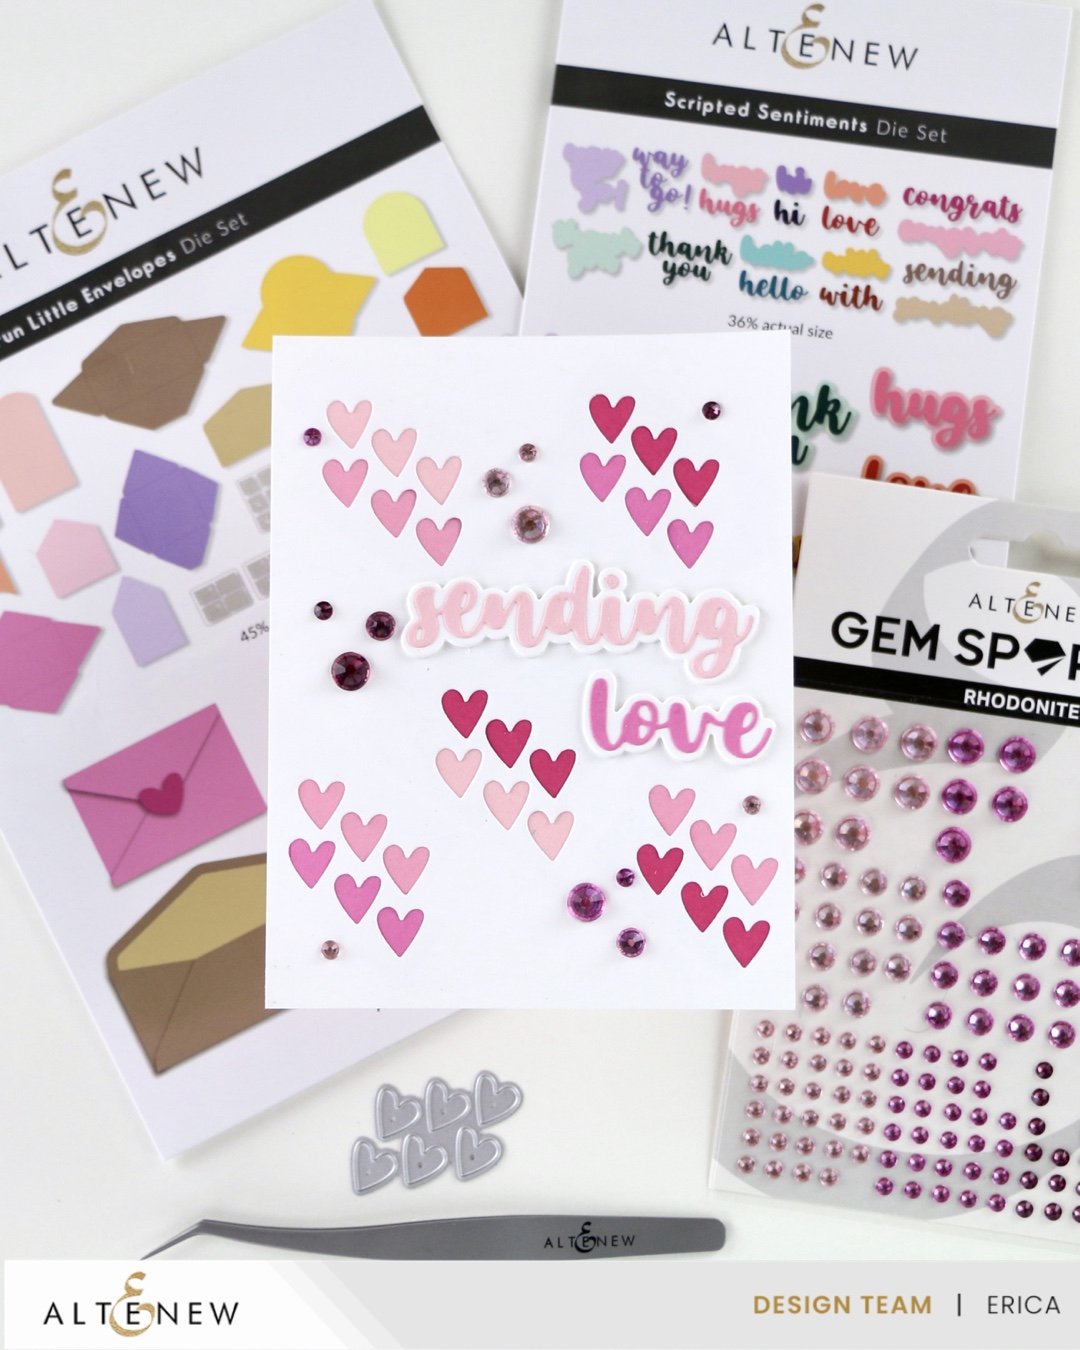
This is a MUCH easier way of adding coloured hearts than do inlaid diecutting, where you have to puzzle each heart into the correct shape to avoid any gaps.

The sentiment is from the Scripted Sentiments diecut set, and it simply says ‘sending love’, which I thought was kind of perfect for this cause.
There is a Youtube video for this card, and another, over on the Altenew Youtube channel, if you want to see them come to life.
That’s it from me for today, but I hope you enjoyed this post and that you will enjoy the rest of the hop.
With love and light, creativity and sparkle from Erica

Currently you can save up to 50% off some amazing goodies in THIS SECTION. Click on the picture and it will take you to the sales site.

Pinkfresh Studio “Joyful Blooms” Release Blog Hop
It’s time to bring spring into the studio with the Joyful Blooms release from Pinkfresh Studio! Join me for a blog hop with tons of inspiration and an amazing giveaway!
Exploring the Pinkfresh March Release: Cards that Blossom with Creativity
The Pinkfresh Studio March release has arrived, bringing a delightful array of products that inspire creativity and floral elegance. Among these new offerings, the very Pinkfresh-esque floral washi tapes stand out! These gorgeous washi tapes, alongside the coordinating stamps and diecuts, provide the perfect tools to create unique and vibrant greeting cards in minutes! I was thrilled to dive into this release and craft two distinct cards that truly embody the name of the release: Joyful Blooms.

Card 1: Grateful for you always
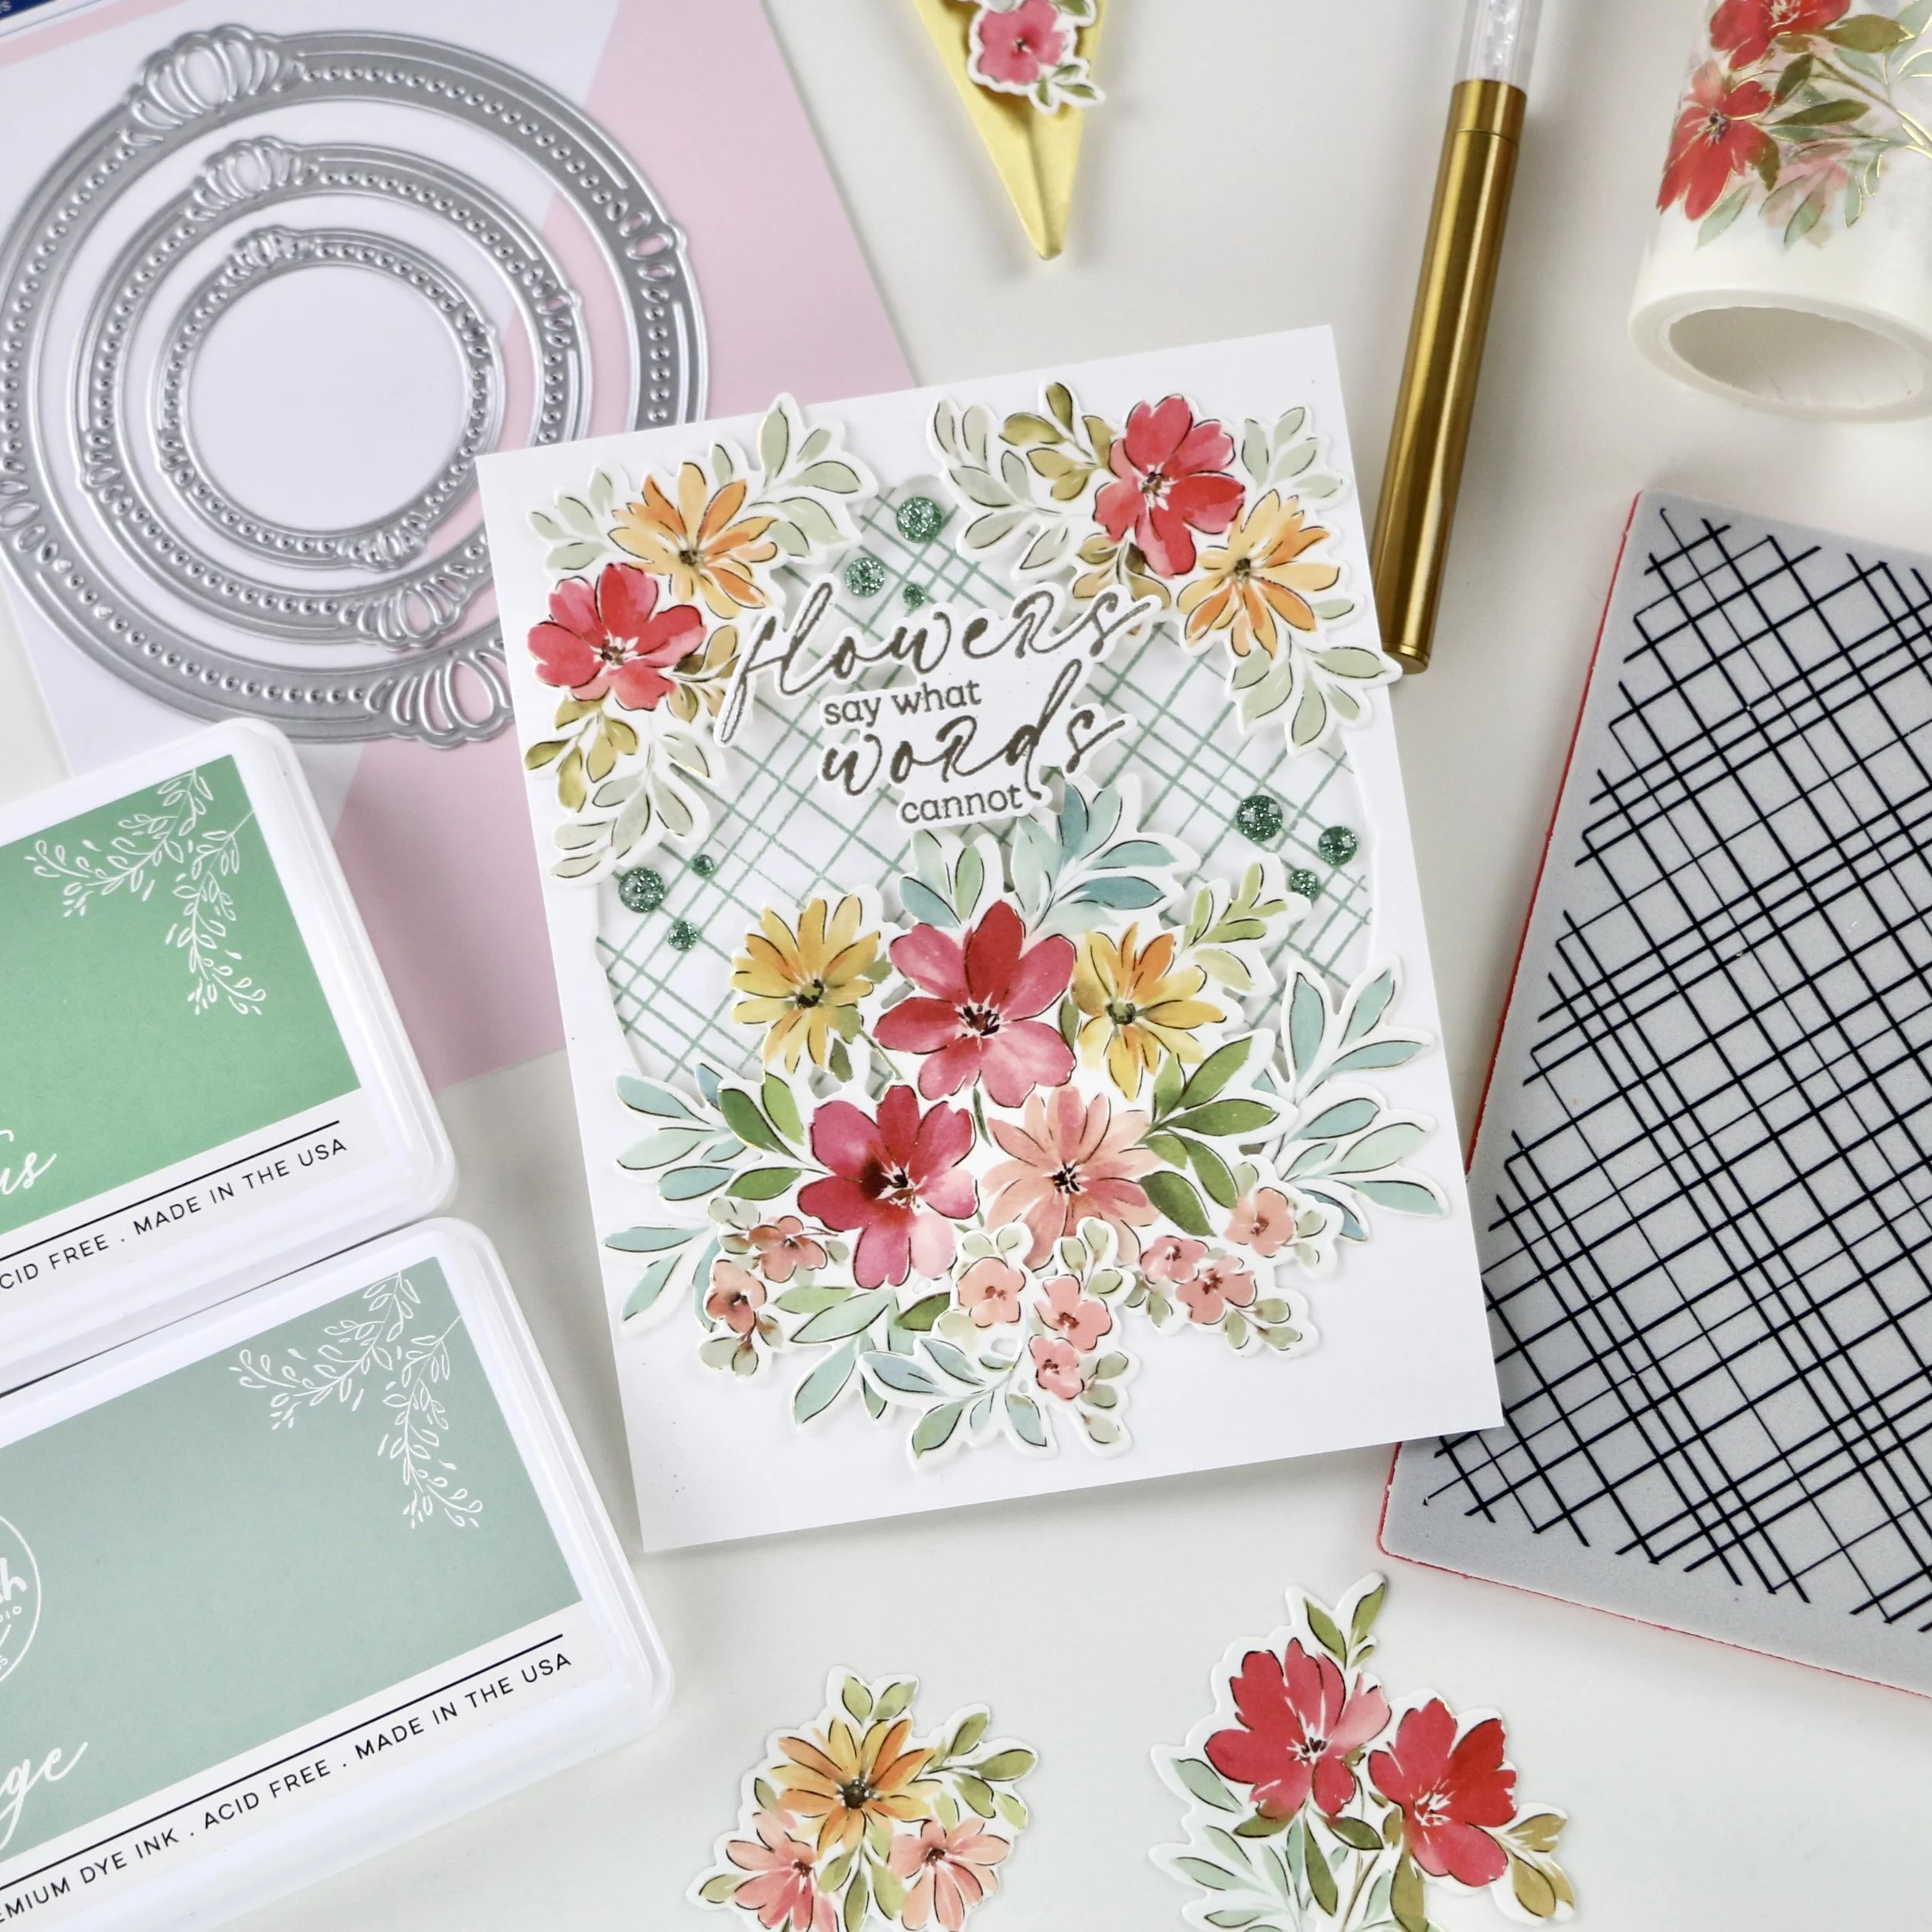
For my first card, I wanted to showcase the intricate beauty of the new floral washi tape Flowers For The Soul and the gorgeous new addition to the Essentials range: Elegant Circles. I began by diecutting out several sheets of the washi, separated the flowers and set these aside. Next up, I also diecut out the biggest of the Elegant Circles out of crisp white card stock.
These beautiful flowers became the focal point of my card design, and the Elegant Circle diecut brings the eye to the flowers.

After ink blending some Sage ink over about half of a card panel, I arranged the big bouquet of flowers so it was coming up through the circle, which is popped up with foam tape. The vibrant colours of the flowers really pop against that soft, pastel background.
As a finishing touch, I incorporated a charming sentiment from the Flowers For The Soul stamp set. I heat embossed the sentiment “Grateful for you always” in platinum onto white card stock, which I then diecut out and adhered across the bottom of the card, creating a harmonious balance with the florals. One final flourish was a few Champagne Glitter Drops to coordinate with the platinum heat embossing.

Card 2:
For the second card, I opted for a less subdued approach. I began by creating an interesting background by stamping the Dainty Plaid cling stamp in Sage ink on white card stock. Then I again selected the Flowers of the soul washi tape flowers to decorate my card with.
Here I used the ‘leftover’ panel from when I diecut the Elegant Circles diecut out of a panel of white card stock, to create a peek-a-boo look. This negative space panel was placed over the Dainty Plaid background, with Instant Dimension Foam Tape to add some height.

Next, I took the Flowers of the soul washi florals and decorated the front of the card generously. On this card I used another sentiment from the coordinating stamp set, this one says ‘Flowers say what words cannot’, and it’s also heat embossed in Platinum. The contrast of the patterned background, against the white front, and then all of these lovely flowers, makes the sentiment stand out beautifully.
To add some sparkle the card's overall aesthetic, I added some Glitter Drops in Leaf. These accents provide a touch of dimension and bling at the same time.
Quick Summary
The Pinkfresh March release is brimming with inspiration and versatility. Each product used in these two cards allowed for creative expression, while also providing a cohesive look that brings each design to life. Whether you prefer bold and vibrant layouts or simple elegance, there’s something in this release that can cater to your crafting style. Embrace the beauty of the new stamps, die-cuts, and washi tapes, and let your imagination blossom!
This post is part of a blog hop celebrating the new release, and you should have come here from TaeEun Yoo and the next stop is the amazing Carly Minner! The full list can be found on the Pinkfresh Studio blog post, as well as down below via the inLinkz link.
There is a very generous GIVEAWAY to celebrate this release as well. Pinkfresh Studio is giving away THE ENTIRE RELEASE to one lucky winner!! You must make sure to comment on the Pinkfresh Studio March release blog post, and for an extra entry, also comment on the release YouTube video!

If you hop along the blog hop and leave comments, you will also be in with a chance to win one of TEN $50 gift cards to the Pinkfresh Studio shop! The winners will be drawn on March 19th, and make sure to check out the Pinkfresh Studio GIVEAWAY PAGE and email them within two weeks to claim your prize! Good luck!
I also made a YouTube video to showcase the gorgeous Peony Perfection washi tape suite, and I went a tad crazy… which if you know me, is an understatement. I made SIX more cards! Check out the video on my channel if you want to see just how easy it is to create stunning cards, that look like you have spent hours on them, in a jiffy!!

Now, that really is it from me, thank you so much for stopping by today!
With love, light and creativity from Erica

Diecutting, ink blending and foam Tape =3 cards!
Hi!
I’m popping in with even more Craft-A-Flower Bearded Iris cards as I couldn’t stop myself while making them.

This is honestly one of the most stunning layering diecut flowers I have ever played with. The level of detail and thought behind this is crazy and I’m here for it!

I have used pretty much the same inks for all of them, Shades Of Purple and Whispering Woodlands Fresh Dye Ink bundles, and a little bit of of yellow.

The backgrounds are different, one is ink blended with the Dancing Drops stencil, one is done with Shimmer Relief Paste over the same stencil and finally I have also used the Foil Leaf Stencil with the Whispering Woodlands Fresh Dye Inks.

Look at that shine and shimmer!!
I have used lots of Instant Dimension Foam Tape to layer them up and create all those luscious layers.


Pinkfresh Studio “Pure Bliss” Release Blog Hop & Giveaway!!
Hi and welcome back to my blog!
I know that last month I told you that things would be different for the Pinkfresh Studio releases this year, and that the blog hops would stop but it seems the people have spoken and by popular demand, they are back!!

So first things first, this is a blog hop so you should have come here from the insanely talented Emily Midget and the next stop is the one and only Rachel Alvarado. The full hop list can be found via the inLinkz link and also on the Pinkfresh Studio blog post.
There is a very generous giveaway as well to celebrate! TWO lucky winners will win the entire release! To be in with a chance for this incredible prize, you will need to comment on the Pinkfresh Studio blog post and on the release video on the Pinkfresh Studio YouTube channel.
Furthermore, TEN $50 gift cards to the Pinkfresh Studio shop will be given to randomly drawn names from across the blog hop stops.

Winners will be drawn and announced on February 19th on the Pinkfresh Studio Winner Announcement page. Make sure to check it and if you see your name there, you have two weeks to email Pinkfresh to claim your prize.
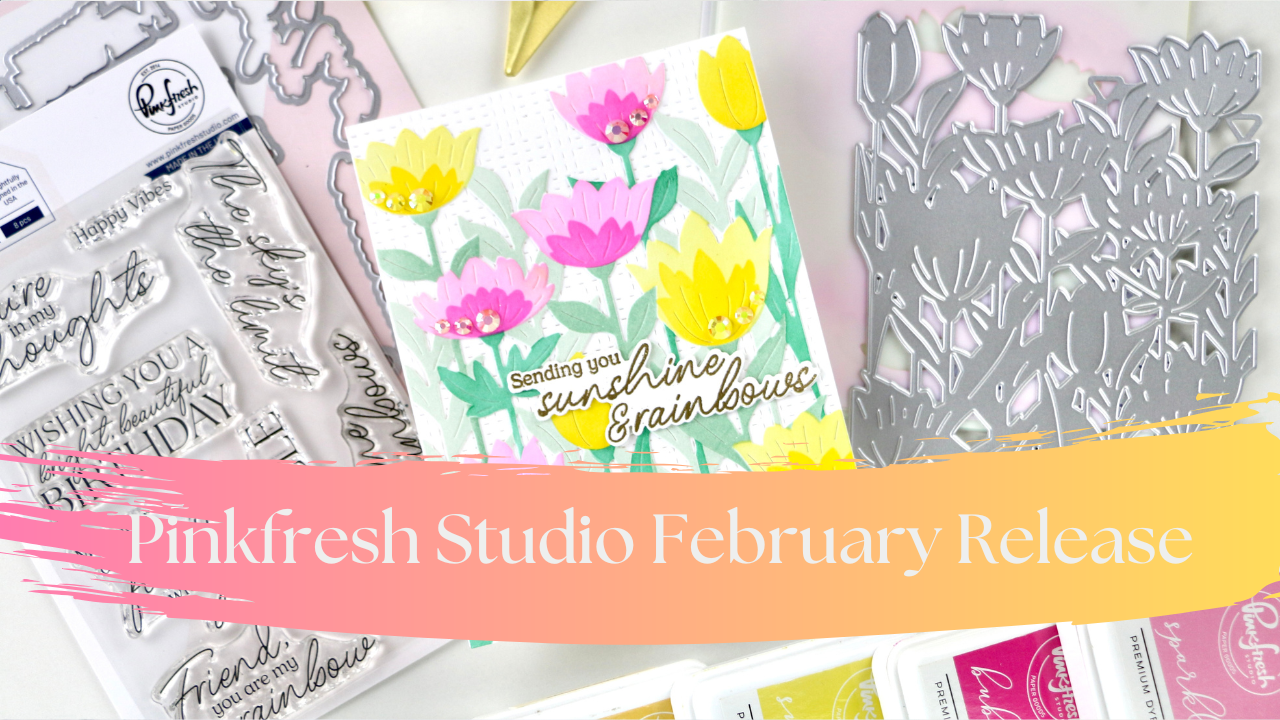
For my card I have used the You Are My Rainbow product suite, which is a lovely sentiment set. There is a stamp set, and coordinating diecuts to give that lovely detail of each sentiment being perfectly cut out.


If you know which sentiment you are going to use on your card, it makes sense to just stamp that one, but if you are prepping for a big card making session, why not stamp up several in one go? Heat embossing these look fabulous, by the way.
I made a video showing off the release as well as the process for my cards. I have used the Floral Field product suite as well, for two different cards. They both have You Are My Rainbow sentiments on them.

The Floral Field set comes with layering stencils and a coordinating diecut, and for my first card I used Sage, Eucalyptus, Spruce Tips, Lemon Whip, Sunshine, Sweet Mustard, Sparkling Rose and Bubble Gum.
After ink blending the Floral Field image, I used the coordinating diecut to cut it out, and while I had my diecutting machine out I also used the Stitched Basket Weave cover plate on a piece of white card stock for the background.
I heat embossed the sentiment in Rich Gold embossing powder and used the coordinating diecut to cut it out, as well as a couple more pieces to layer it up.
I also added a few Ballet Slipper and Sunshine gems on the card and with that, the card was done.
The second card is using the same Floral Field product suite, only with different colours. This time I used Mint, Meadow, Emerald City, Lemon Whip, Sweet Mustard, Sparkling Rose and Raspberry Bliss.

I used the Floral Field coordinating diecut again, but for this card I had a differed idea for the finished card. I wanted to create a bit of a stained glass window look, so first I cut out the biggest oval from the Essentials Nested Ovals Double Stitched out of an 11”x4.25” piece of card stock.

First you need to score the card stock as you would a normal card base, and then open it with the front facing down. Glue down the floral diecut and then layer it with a panel of vellum.

This sentiment, Wishing you a bright, beautiful birthday, is also heat embossed in Rich Gold, but not layered up, and the card is finished off with Glacier gems.
That’s it from me for today, but don’t forget to hop along for more inspiration and check out my YouTube video too! If you shop the new release from Pinkfresh Studio, I’d be so grateful if you use the compensated affiliate links I have used in this blog post. They don’t cost you anything extra at all, but the earrings I get from these are essential for the running costs of this website, VPN, filming equipment and software etc. You know, the boring but necessary stuff.
Lots of love and creativity, sparkle and light from Erica

Altenew February Release, Giveaway, video and new fave craft-a-flower!!
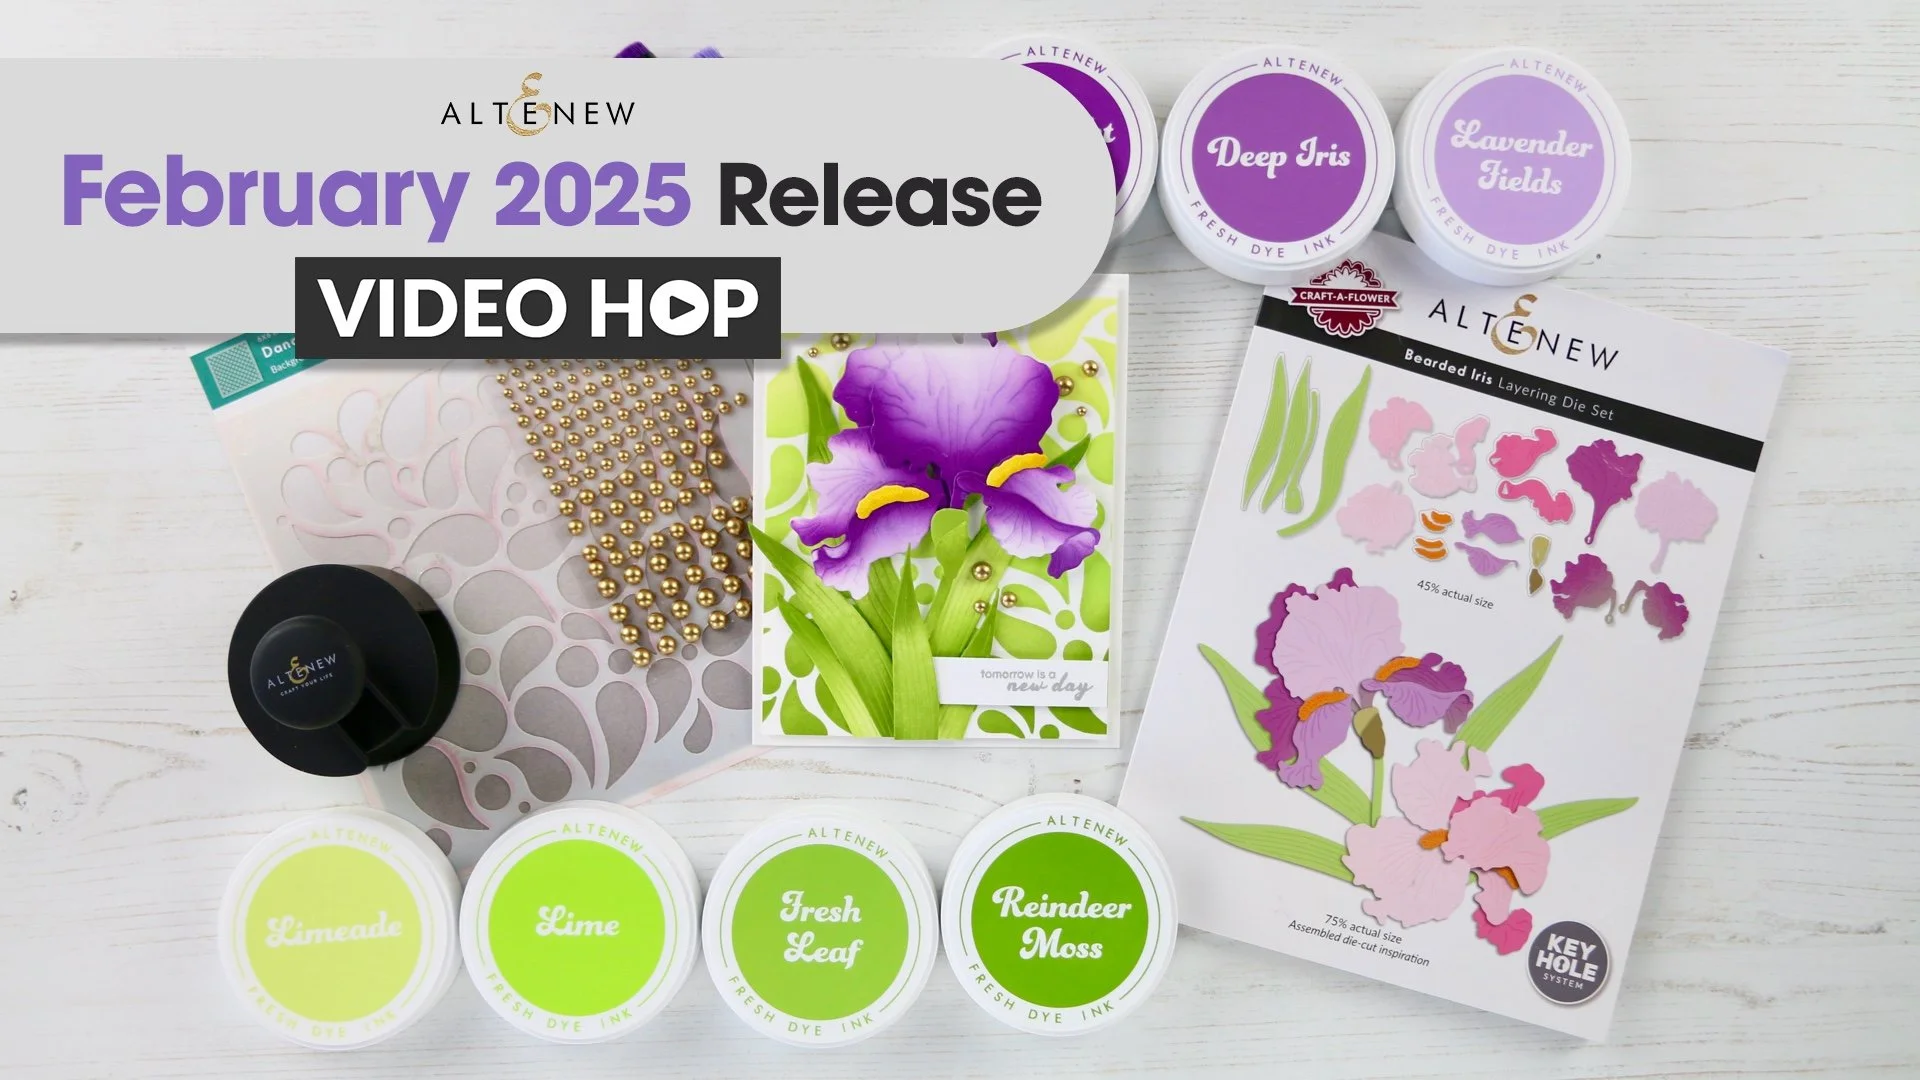
Hi and welcome back to my little blog. Today’s post will be quite short, as I am just popping in with a little one to let you know I’m part of a YouTube Hop to celebrate the Altenew February Release!
First off, there is a generous giveaway and Altenew is giving away $300 in gift cards to give winners! One grand prize winner will get a $100 gift card and four additional winners will get a $50 gift card each!

All you have to do to enter is comment on the Altenew video, but the more you comment along the hop, the bigger your chance to win!
You have until the 11th of February 2025 to comment, and winners will be announced on the Altenew Winner Page on Feb 13th!
I instantly, and I really mean INSTANTLY, fell heads over heels for the Craft-A-Flower Bearded Iris Layering Die Set! Oh holy cannoli, does this make my florist heart sing with happiness!

The Shades of Purple Fresh Dye Ink Bundle is a match made in heaven for this gorgeous set, and I have diecut and ink blended my little heart out.
I couldn’t stop making these… they are so gorgeous and I’m absolutely BRIMMING with inspiration!

There are also some fabulous stencils in this release, and I absolutely adore stencils. They are affordable, versatile and take up very little space in your craft room which is always a big plus. Another fabulous product coming in this release is the Shimmer Relief Pastes.

This is the Dancing Drops Stencil done with the Whispering Woodlands Fresh Dye Ink Bundle.

I have made so many projects with this month’s release and I will be sharing them throughout the next week, so make sure to keep an eye on my social media, like Instagram and Youtube!
With that, I hope you get a chance to watch the YOUTUBE VIDEO and hop along with us!
Lots of love and creativity, sparkle and light from Erica

Altenew Sneak peeks Galore + VIDEO!!
Hi and welcome back to my blog!
I have a video and a handful of cards to show you today, and I am mixing and matching some older Altenew products with some brand new, very exciting products! These will be available in the Altenew shop on Feb 5th so mark your calendars!

The first products are two new widths of the absolute must-have Instant Dimension Foam Tape. There will be an Instant Dimension Foam Tape 1” width and an Instant Dimension Foam Tape 1/4” width to choose from, alongside the original Instant Dimension Foam Tape 1/2” width. These are all 1/16th” height, which is a good height BUT if you like higher tape, there will also be Instant Dimension Foam Tape available in 1/8” height, in 1/4 inch width AND ½ inch width.
I have a video on my YouTube channel showing these two off, as well as showing the amazing results of the brand new Shimmer Relief Pastes, that will also be available on Feb 5th! I have used Enchanted Gold and Antique Silver on my cards.
On this card, I have used one of my favourite stencils from 2024, Stencil Art: Nature Splashes with the Tranquility Fresh Dye Ink Bundle, which so happens to be my favourite blue ink family. I used the Antique Silver Shimmer Relief Paste with stencil no5 to add some details to the panel, before cutting it up and layering it up with Instant Dimension Foam Tape.
This one I layered up on top of a background of Dark Night coloured card stock from Altenew, and then it’s finished off with a stacked You Are Loved word diecut.
This green and gold background got chopped up, and then puzzled back together with different heights thanks to that fab foam tape. I used the same You Are Loved word diecut, but this one got a spot of colour added by ink blending Parrot ink in an ombré fashion.
Here are the four backgrounds before any sentiments had been added. Each one has a little something that makes it unique, and I like that.
I hope you get a chance to check out the video, it’s a very long one so I would recommend you getting a snack, use the bathroom before you sit down and settle in.
Down below you can find compensated affiliate links to the products I have used in the video at no extra cost to you. If you shop using these links, I get a small commission from Altenew directly as a thank you for directing you to them. This is how I earn a little bit of money to help cover costs like website hosting, filming equipment and therapy to bring me down from the insanity that dealing with technology bring on, LOL.
As always, with creativity, sparkle and light, especially in these dark times. Big hugs and lots of love from Erica
Altenew shop
Fresh Dye Ink Bundle Tranquility
Fresh Dye Ink Bundle Tropical Forest
Stencil Art: Nature Splashes stencils
Scattered Tiles Stencils
Small Blending Brush set (Flat Bristles)
Detailed Blending Brush set (Angled Bristles)
You Are Loved word diecut
Metallic Watercolors 14 pan set
Instant Dimension Foam Tape 1”wide
Instant Dimension Foam Tape /2” wide
Instant Dimension Foam Tape 1/4” wide
Shimmer Relief Paste bundle
Shimmer Relief Paste Enchanted Gold
Shimmer Relief Paste Antique Silver
Dark Night colored cardstock
Brushed Gold Metallic Cardstock

ALtenew Dye-Licious Instagram hop and a Video!
Hi!
Today I’m just popping in really quickly to let you know there is an Instagram hop going on. Altenew has a range of gorgeous inks in all colours and shades, and that is definitely something worth celebrating. I love colours and use them generously on most of my projects. A Clean And Simple style of gal I am not… Apparently a bit of Yoda I do have in me though.

I have used the aptly named Sugar Rush product suite for two cards, and I have a YouTube video for these too over on my channel.
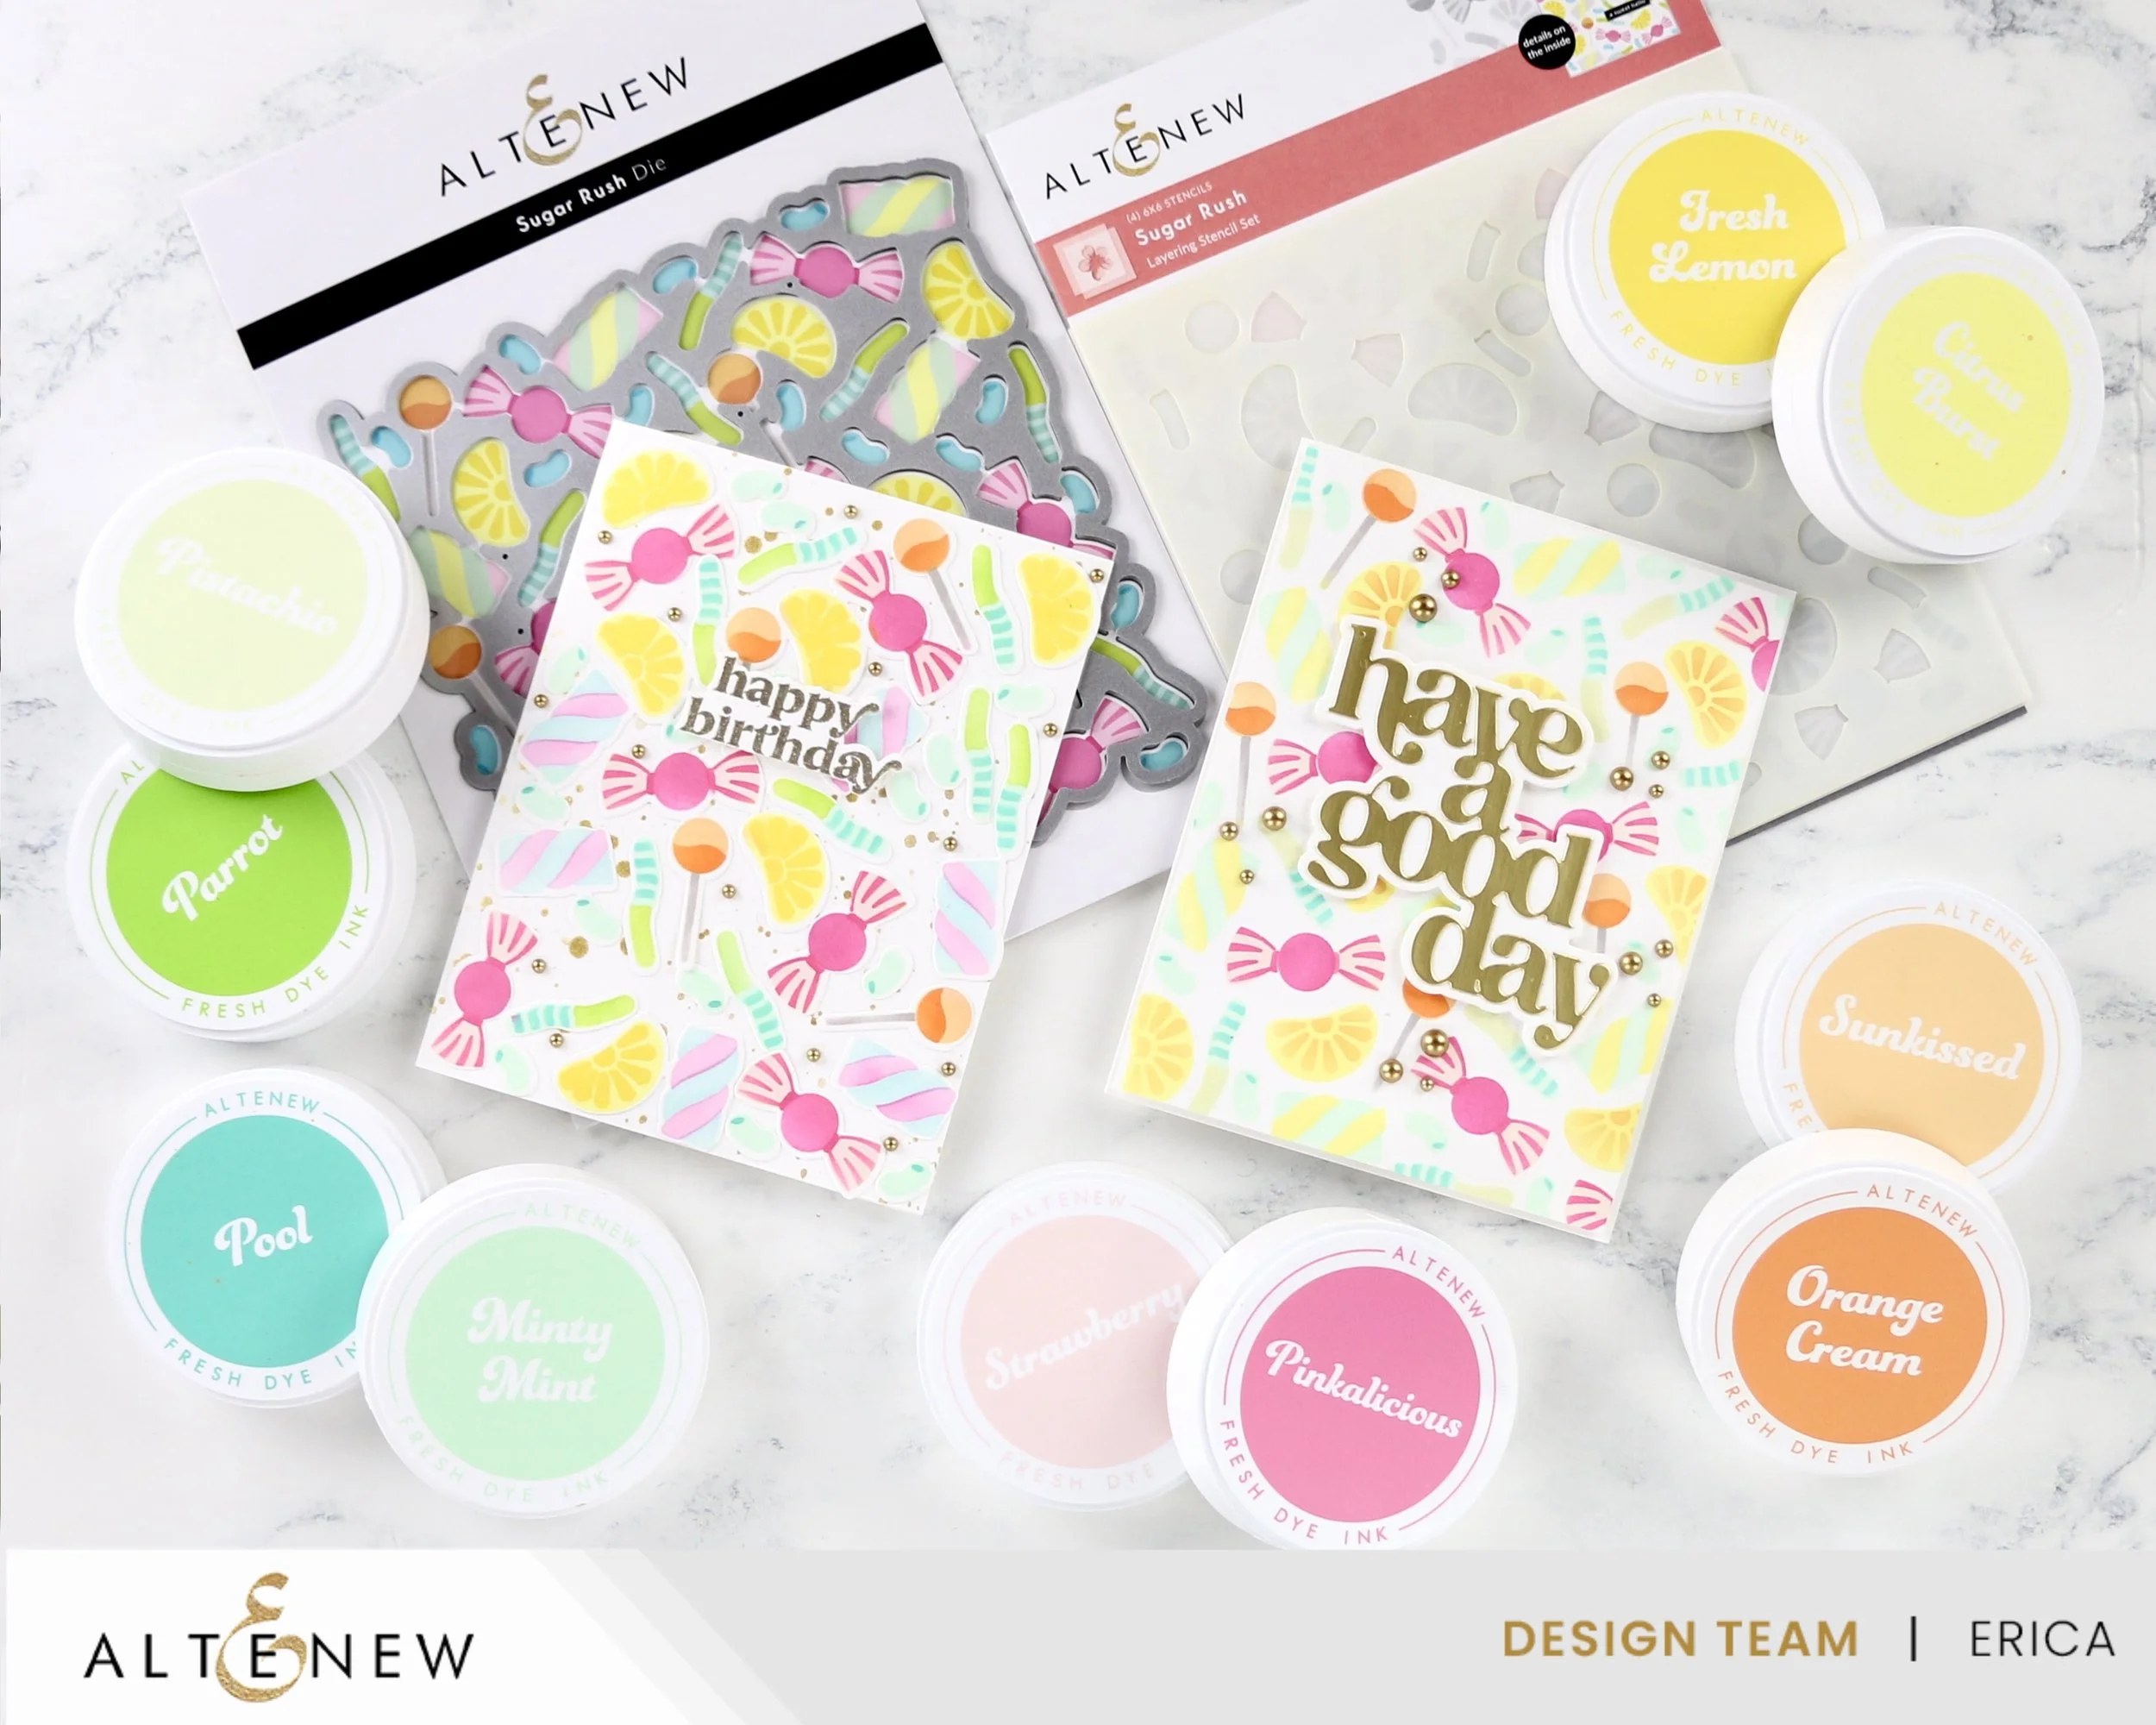
The Sugar Rush suite consists of layering stencils and a coordinating diecut, and I have used SO. MANY. INKS to make these colourful cards! I have also used so many different ink blending tools, like the small flat bristled ones to the mini angled brushes ones.

At the risk of being a one-trick-pony, I have used the Timeless Sentiment 2 diecut set for one of the cards. It is one of my favourites, after all so hey, don’t come for me.
For this ‘have a good day’ I used white card stock for the shadow part and Brushed Gold Metallic card stock for the actual words. This is popped up with a bit of Instant Dimension Foam Tape for extra dimension.
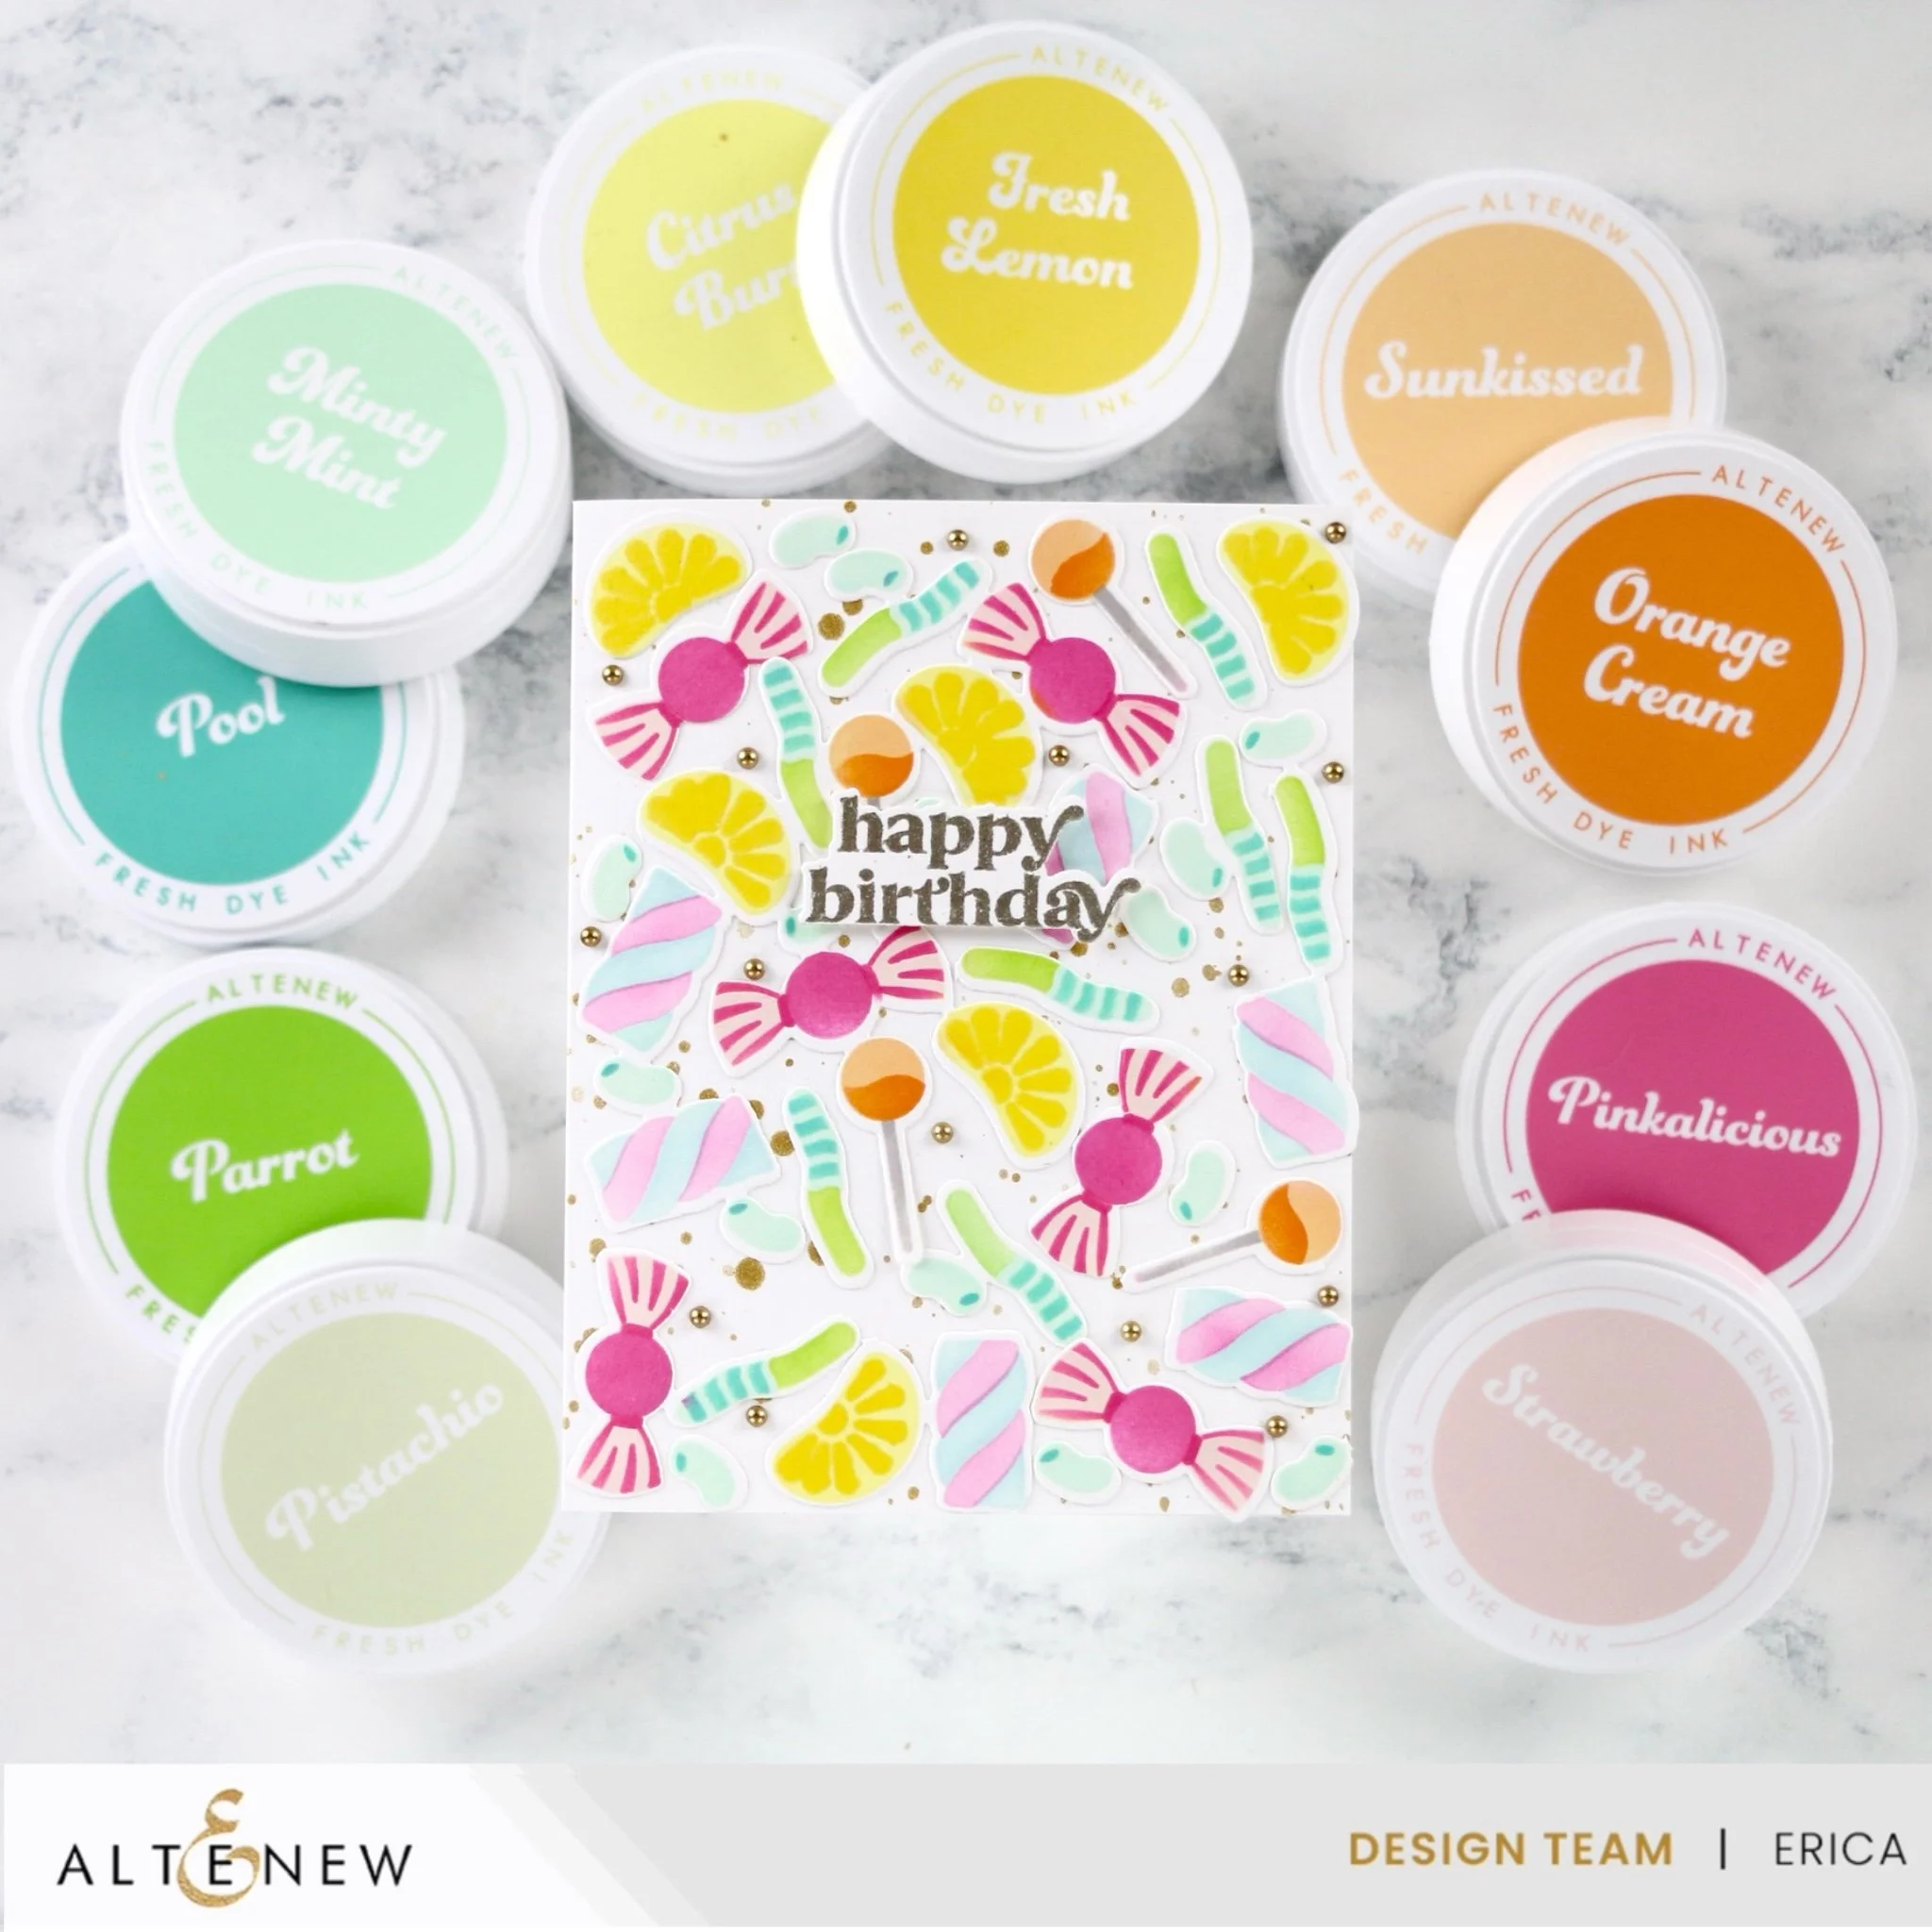
This is actually images from the first ink blending I did, but I wasn’t 100% happy with how it turned out so I decided to use the coordinating diecut to cut out the bits that had bled. I ended up with enough pieces leftover to cover a whole card base, so that’s what I did.
This one has some gold water colour splatters on it too, from the Metallic Watercolor 14 pan set, and I think it adds just enough to make the background a bit interesting. On this one I also added some Satin Gold Pearl Dots and a heat embossed sentiment from Pocket Sentiments.
The giveaway has already concluded so ignore all of that, and focus on the card making in the video. I hope you enjoy it!

That’s it from me for today, thank you so much for stopping by and don’t forget to join in the Instagram hop for your chance to win some prizes!

Altenew are also running a deal right now, where you can pre-order the Shimmer Relief Paste bundle and get a free gift (applies only to the first 100 orders though so be quick!) and these luscious products are launching on Feb 5th!
I have used compensated affiliate links to Altenew in this post. If you shop using these links I get a small commission directly from Altenew at no extra cost to you, whatsoever! This is their way of thanking me for endorsing their products and spreading inspiration all over the place like glitter and confetti! The earnings I get from these links help me pay for things like hosting this website, firewalls and VPN for protection, and all the usual stuff like filming equipment and so much glue…
Thank you so much if you choose to support me by shopping with these links. It really means the world to me and I’m so grateful!
With love and light, sparkle and creativity from Erica
Pinkfresh Studio January Release Beautiful Life
Hi and welcome to the first blog post of 2025!
I am starting the year with some absolutely thrilling news! I will be part of the Pinkfresh Studio design team for the first half of the year, and I’m so happy about it!
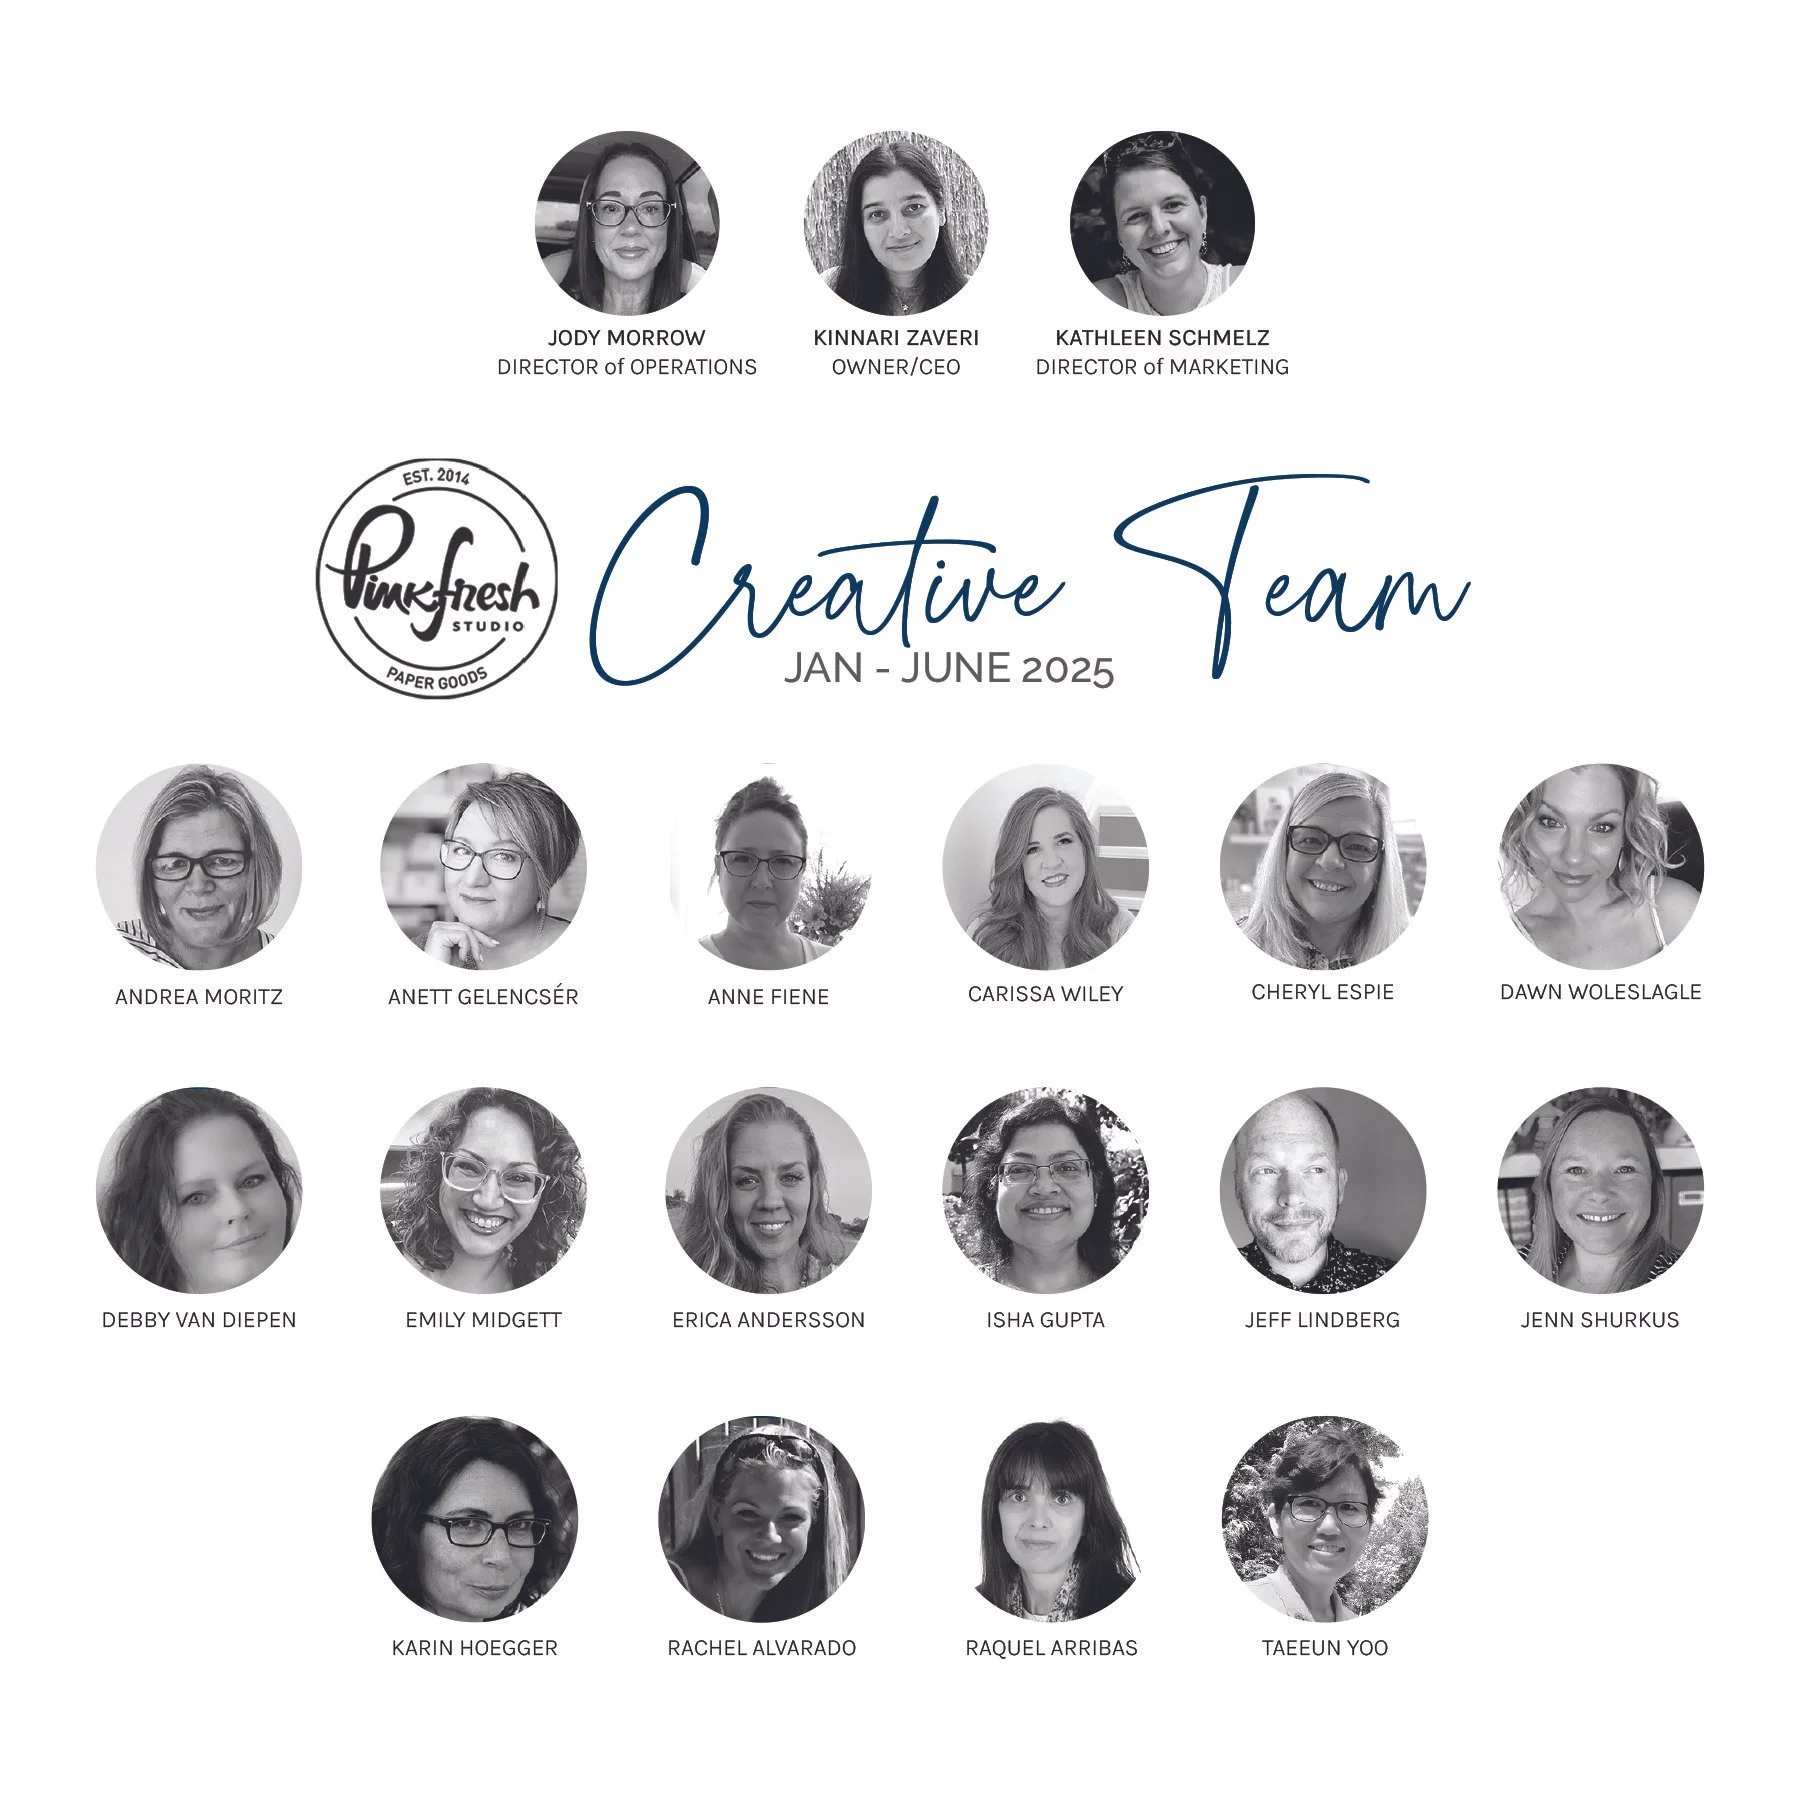
To see my picture amongst all of this talent is such a dream come true!
Today is release day for Pinkfresh Studio, the first of 2025 and it’s called Beautiful Life. Which I think is such a great name for the first release of the year, it sets a hopeful outlook for us.

This year we are not doing blog hops for the releases anymore, but I thought I’d pop in here and share that with you all as not everyone is on Instagram. That is where we will be doing release hops and giveaways now, and speaking of giveaways: If you comment on the Pinkfresh Studio Instagram post you can win the whole shebang! Yep, the entire release. (insert mind blown sounds here)
Something else that is different is that the usual ten $25 gift cards are now ten FIFTY DOLLAR gift cards!!
If you are not already on Instagram, sign up now and follow me and Pinkfresh Studio for your chance to win some of these generous prizes!
The photo below is my profile picture, so you can check you are in the right spot.

Now for my card, I have used the beautiful Butterflies In Bloom product suite, which has a Press Plate, stamp set, coordinating diecut and coordinating layering stencils.


The only product I didn’t use was the stamp set, and I have more cards to share later in the week. If you don’t want to letterpress or hot foil, the stamp set is for you for sure.

I hot foiled the image in Gold first, and then used the coordinating layering stencils to add some soft colours to it. Once that was done, I cut it out using the coordinating diecut.

I do love a bit of texture and interest to a background, and for this card I used the Stitched Chains Cover Plate. Before running it through my die cutting machine I rubbed some Espresso ink over it to add even more interest to the background.
I also used one of the Essentials: Blanket Stitch Brackets dies on the panel to create even more interest. One of the pieces I have propped up with Instant Dimension Foam Tape from Altenew.

Final touches were a hot foiled sentiment from the Butterflies In Blooms Press Plate set, and I have stacked this with two more pieces. A little smattering of bling was absolutely needed and I used Espresso gems.

That’s it card making wise, but I thought I’d just mention that I have used compensated affiliate links in this post. What that means is that if you click on any of these links and actually buy something, I get a small commission from the company directly. In this case, Pinkfresh Studio and Altenew, AT NO EXTRA COST TO YOU!! Yes, that’s right. This is one of the ways you can support me as a creator if you shop. It never costs you anything extra, but it shows the companies I work with that I bring traffic and orders to them. Which in turn makes them more likely to keep me on their design team, and most importantly, it helps me make some money so I can become financially independent and support my little family. Thank you so much if you shop using my links, I really, really appreciate it more than you will ever know.

If you are looking for some great slimline dies to add to your collection, there is currently 50% OFF the dies in this section!

There is also the CLEARANCE section where you can find all sorts of amazing products at great discounts. These are likely to be discontinued once sold out so if you see something you want, don’t delay. As they say, you snooze, you loose.

If this is the year for you to start scrapbooking and putting those memories into albums, this deal might interest you and give you that kick start to actually start your holiday scrapbook: Holiday Magic Scrapbook Bundle with Linen Album

For qualifying orders, you also get a free gift while supplies last! That Abstract Triangles hot foil plate has been a favourite of mine since it was released and I’m so sad it’s been discontinued.
Right, now I really am done, but thank you if you made it this far! Down below I have linked the products I used, except for the inks and blending tools, with compensated affiliate links.
With love and light, sparkle and creativity
Erica


Pinkfresh December release Gentle Greetings & Greenery | Giveaway and Video!
Hi and welcome to the last Pinkfresh Studio release of 2024!
Wow, this year has absolutely FLOWN by, I can’t believe it is almost over already. So much happened this year, so many life lessons have been learnt, they have both been suffered through as well as empowered me. It’s been a year of self discovery, growth and so many ups and down. Life, eh? I can’t wait to see what 2025 has in store. Thank you for coming to my TED talk, by the way!
Ok, now to what we are really here for: Pinkfresh Studio’s December release, which is called Gentle Greetings & Greenery! I am one of the stops of a celebratory blog hop, you can find the whole lineup via the inLinkz link here and if you came here from the talented Enza Gudor you are in the right spot! The next stop on the hop is the amazing Heather Hoffman. If you come across any broken links, the whole line up can also be found on the Pinkfresh Studio blog post.

It wouldn't be a celebration without a generous giveaway, and this is no different! You can win THE ENTIRE RELEASE, yes, you read that right! You can actually win the whole shebang by commenting on the Pinkfresh release blog post, and you can double that chance by commenting on the Pinkfresh release YouTube video. If you hop along with us here on the blogs, and leave comments, there are TEN $25 gift cards to the Pinkfresh Studio shop that will be given to ten randomly drawn lucky people.
The winners will be announced on the Pinkfresh GIVEAWAY page on Dec 18th 2024, make sure to keep an eye on that page and claim your prize within two weeks!
I only have one card to share with you today BUT I also have a YouTube video for it, so I hope that makes up for it. You can find the video HERE, or click on the thumbnail down below. If you haven’t already done so, make sure to subscribe to my channel!
I have used the Fresh Herbs product suite, and it comes with a stamp set, coordinating layering stencils and coordinating diecuts.


I wanted my herbs to look quite natural so I have stamped the outline stamp up with Sage ink for one of them and Eucalyptus on a second panel. I wanted to make a really nice and big herb bucket. I have used the same two inks for the layering stencils, plus a touch of Limoncello and Lush Forest.
After I finished ink blending all of my herbs, I used the coordinating diecuts to cut them all out and put them aside for now.

For the bucket I have used Misty Coast, Rocky Slope and Metropolis to create a vintage look. In the video I and also sharing a few tips and tricks on how to get that optical illusion of the bucket being more 3D than 2D. Having the 1/2” Blending Brushes help with these smaller details!

I added Doe ink to the handles, and I tried to get that wood grain look to it by dragging my blending brush rather than going in circles but it wasn’t working. What I should have done was go for a darker colour, like Espresso, rather than do what I did… I grabbed a couple of Copic markers, and attempted (note the word ATTEMPTED) to create that wood grain look but meh…I think it botched the whole look.
For the little sign diecut I used the Copics again and it worked much better this way, and it was probably because I tried adding the Copics to the handles while the stencil was still in place. That just did not work!
I stamped up ‘sending love’ from the Fresh Herbs stamp set with Metropolis ink and then it was done.

I have also used the Interlaced Diamonds diecut for my background. It’s meant to look like vintage wrought iron trellis, to go with my vintage bucket. To get the look I first ink blended a bit of Rocky Slope on a piece of card stock and then I dragged the Metropolis ink pad onto it directly. When this was done I ran it through my diecutting machine and poked out the negative bits. The Interlaced Diamond panel was then glued down directly onto a card base, and then I arranged my herb bucket on top.

I really like how this came out and I had such a great time putting it together! If only gardening and growing herbs was this fast in real life, I would have fresh basil pesto every day, lol!
That’s it from me for today, I really hope you enjoyed this post and get a chance to watch the video too. Don’t forget to hop along with the rest of the hop and to leave those comments on the Pinkfresh Studio posts, that’s where the big grand prize winners will be drawn from! Good luck and happy hopping!

Lots of love and light, creativity and sparkle from Erica